Adding New & Existing Bookings
Add bookings to BoothBook as an Admin
BoothBook
Last Update منذ عامين
You're able to manually add bookings or move bookings from an alternative booking system. We do not offer an import feature by design because when manually adding in your bookings into BoothBook:
- Photobooth units availability will start to adjust automatically
- Future notifications can be scheduled for those existing bookings
- You can see the real journey that your customers goes through and tweak where necessary
- You get a really good grasp of the way that BoothBook works
(You can however, bulk import booking information via a Leads CSV then convert them into Bookings)
Checks before starting...
If you have marked any of your units as unavailable to prevent bookings coming through on the same date. You will need to make them available again whilst you're adding the booking. Otherwise there will not be a unit able to book.
a) How to add a booking that already exists
Written Instructions:
1. Ensure you are logged into your BoothBook admin account.
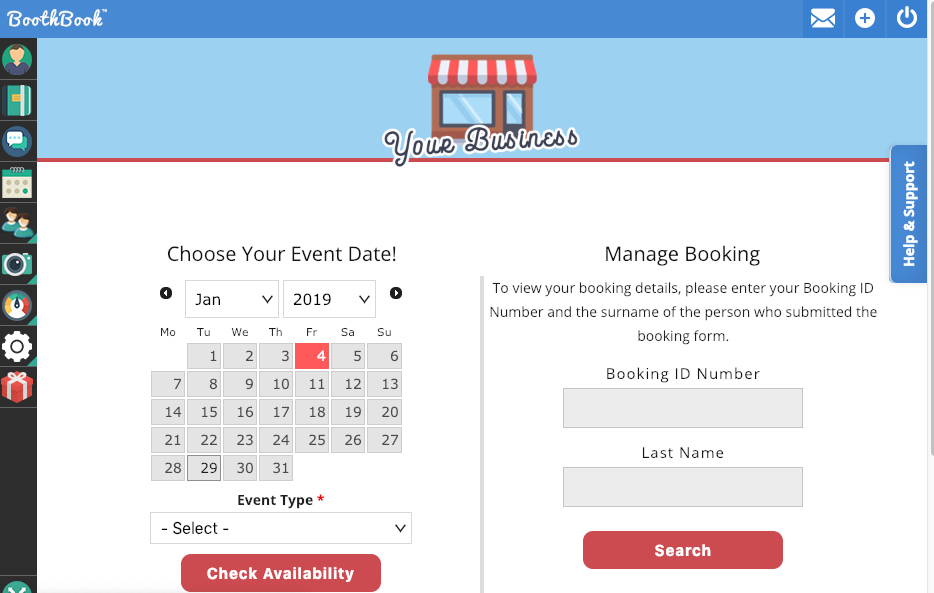
2. Click the BoothBook logo on the top left of your screen to bring up your booking calendar.

3. Select the booking date from the calendar.
4. Fill out the form as if you were the customer (If you are logged in you can easily add bookings for old event dates if needed). If you've got lots of bookings to add in, you could briefly turn any required fields off (via Top User Menu > Settings > Booking Form) to just get in the essential information. Then turn any required fields back on for new customers to book once added in.
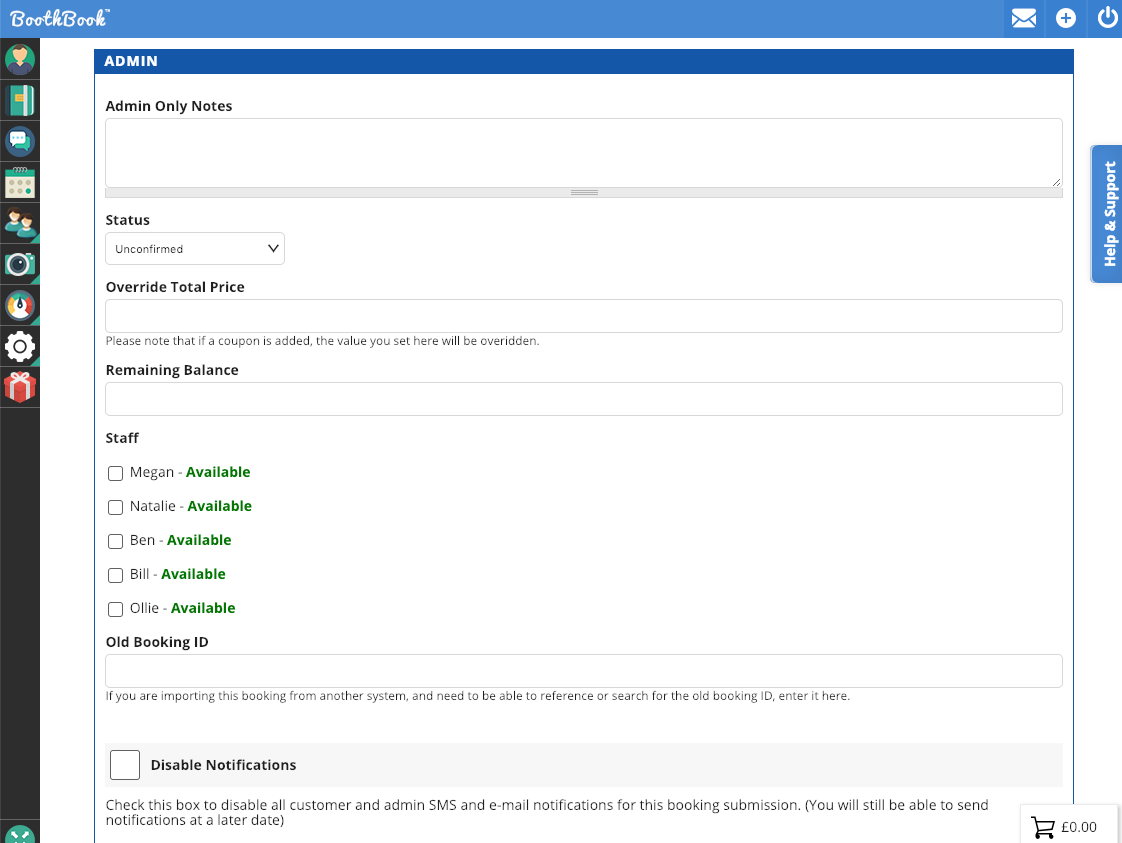
5. Fill out Admin options at the bottom of the booking form. You can override the price of the booking if needed. Please note that the Old Booking ID is searchable in your bookings list. You also have the options to disable notifications to prevent them from receiving a thanks for booking notification. You will need to reactivate them on the booking for them to receive further notifications.

6. If you assign Staff member when Adding the booking, they will NOT be notified. Staff will only be notified to work an event when Updating an existing booking.
7. Click the Book Now button at the bottom of the booking form.
8. Click the Bookings (diary icon) on the left of the screen, find the booking to manually add any payments information.
b) How to add a new booking on behalf of the client
Written Instructions:
Note: If you take a booking whilst logged in to your admin account, you will receive the booking update.
- Log out of your BoothBook account by clicking the Icon in the top right of your page.
2. Select the customer date.
3. Fill in the booking form as if you are the customer.
4. If you use Terms and Conditions, you have a legal obligation to make them aware of these and have verbal conformation of this before ticking that they are read and understood.
5. Proceed to Payment options as appropriate and take payment over the phone.
6. Log back into your BoothBook admin account and make any amendments as needed.

