Lead Capture Form Widget
Configure and add contact forms to your website

BoothBook
Last Update 2 месяца назад
You can add lead contact forms to your own website. These queries and information are automatically added to your BoothBook Lead center after a potential customer has filled them out. As admins, you'll be notified via email when a new one is submitted.
The below videos briefly covers all of BoothBook's current widget's however specifically on the various aspect within the Lead Capture Form Widget.
Written Instructions:
- Go To > Top User Menu > Widgets
- Copy the code for the Lead Capture Widget and paste the code into your website where you would like the Lead Form to show. This default widget code will display fields for First Name, Last Name, Email, Telephone and Additional Notes.
Create Custom Contact Forms
Create as many different lead capture form widget codes as you like. For example configure them for your website contact forms, competitions or corporate landing pages.
- Go To > Top User Menu > Widgets
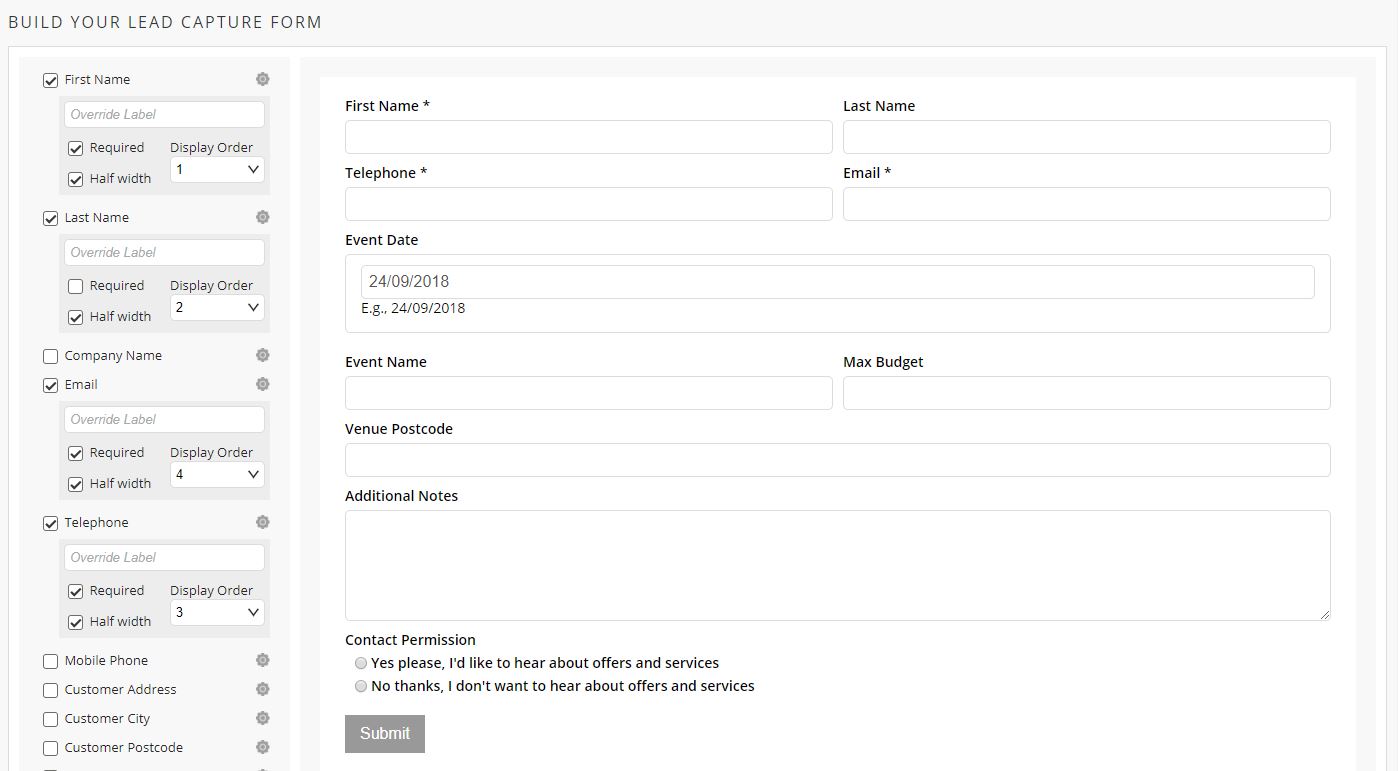
- Under Contact Form click on Create Widget!
- Build your lead capture form and the form will show in the preview box.
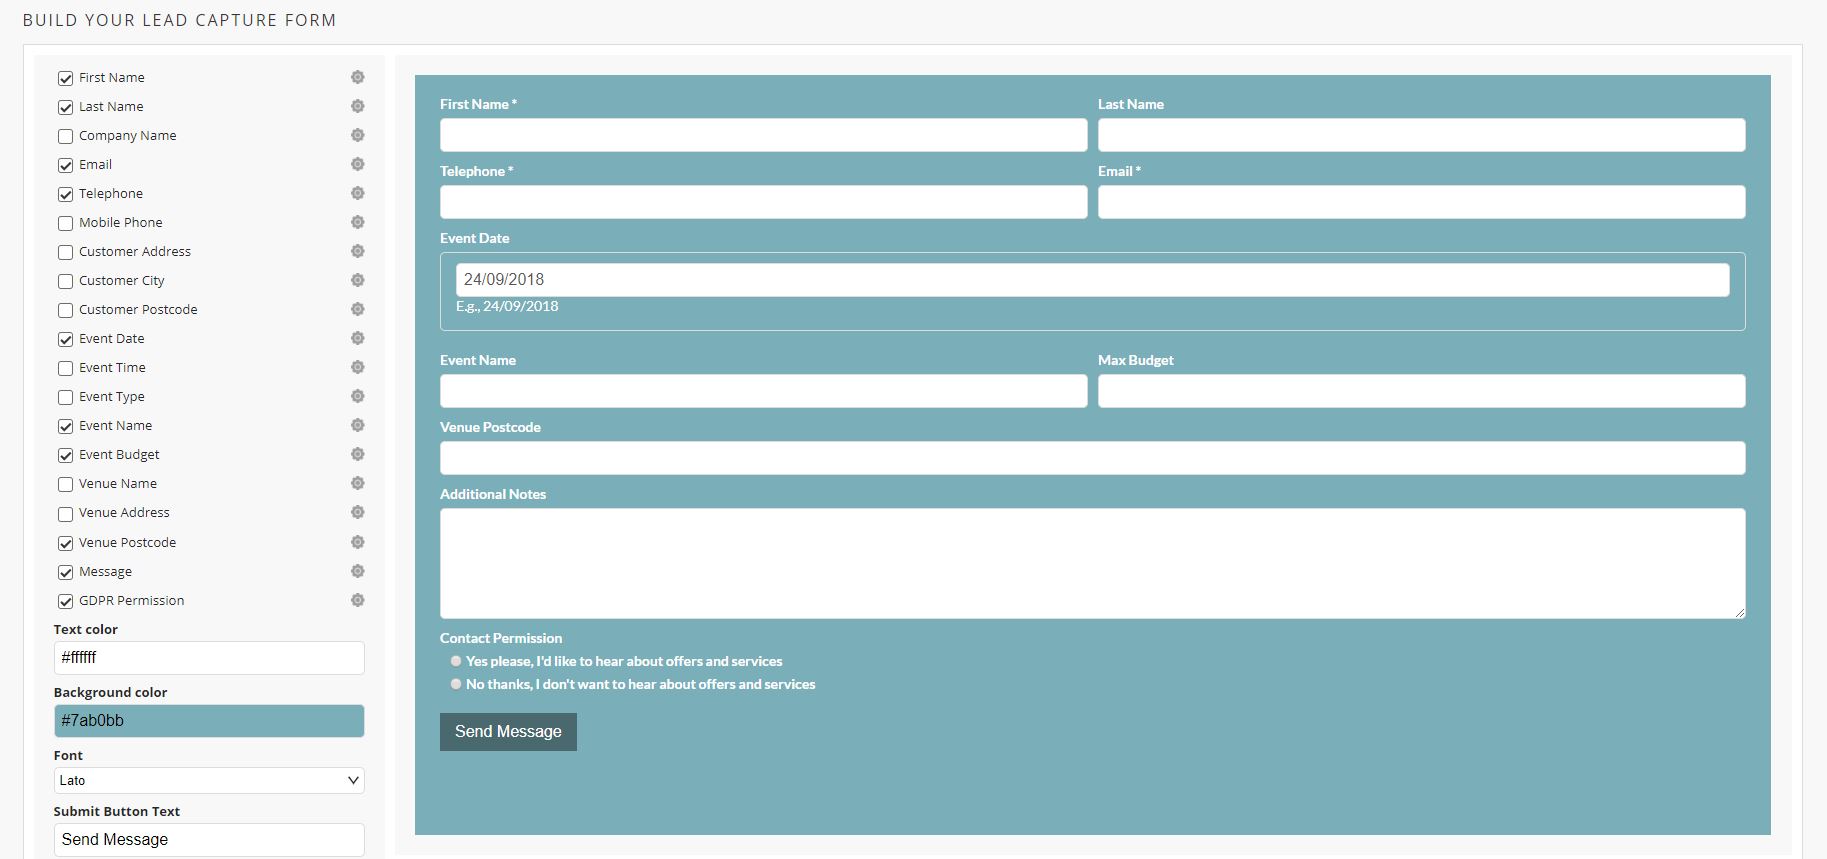
- Tick all the fields that you would like to show on the form. You can click on the cog icon on the right to change the options for the Label, make it Required, display it at a Half the width as well as change the Display Order.
5. You can choose options to change the Text Colour, Background Colour, the Font and the Submit Button Text.
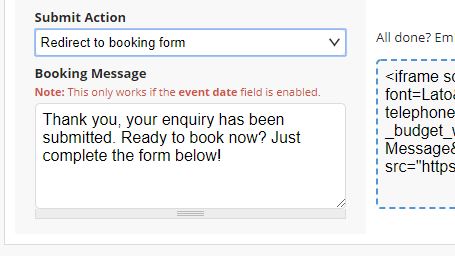
6. You can also choose what happens to the page once the form has been submitted:
- Show Message - for which you can update the text in the Submit Message box
- Redirect to custom URL - which you can enter into the Redirect URL box
- Redirect to booking form (NOTE: this only works if you have the Event Date field enabled) - you can then add/ update the Booking Message text
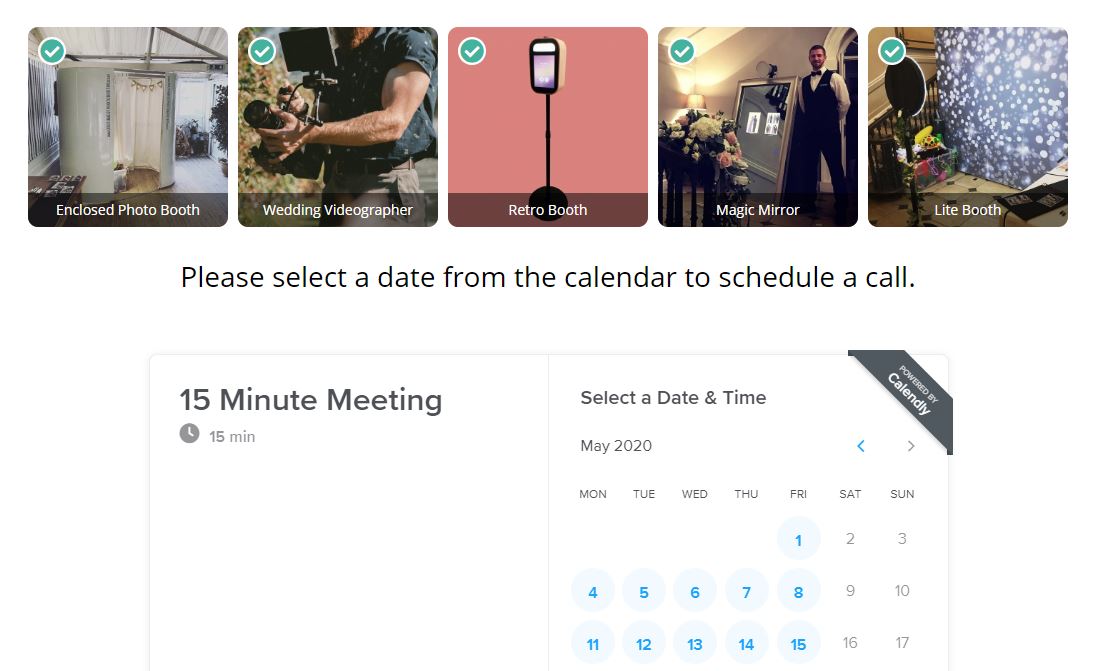
Schedule Calendly Call (NOTE: you'll need to sign up to Calendly and add your API Key via Top User Menu > Settings > More Integrations -Find out how here) - once the form is submitted, the visitor can choose from your Calendly Event Type, your Available Services (for the event date already chosen) and see the Message you have set.
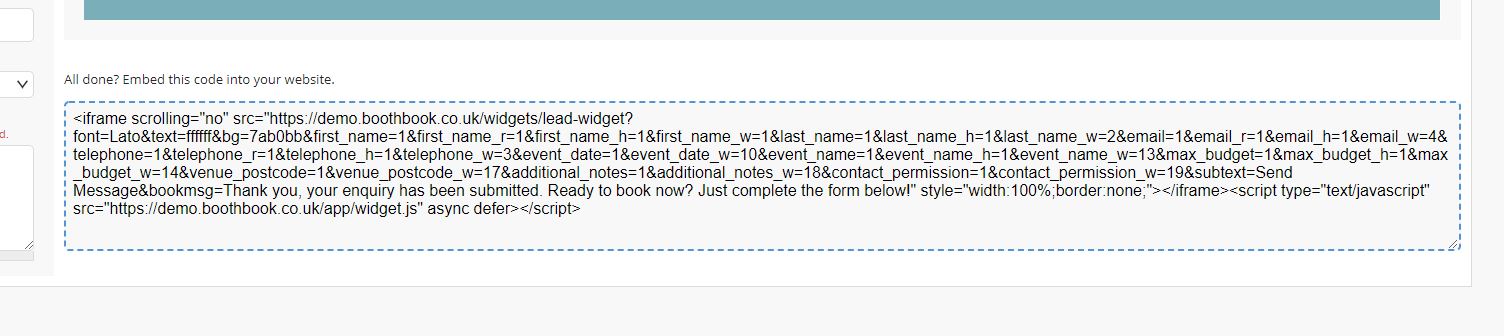
7. Once you've configured your Lead Capture Form, copy and paste the code into your website where you would like the Lead Form to show. This should be in an area of your website where you can edit the HTML. Some help guides are below:
- Wordpress - how to add HTML code
- Wix - how to add HTML code
- Squarespace - how to add HTML code
- Weebly - how to add HTML code
Having Issues in Your Website? - Troubleshoot Problems Here
8. Create another Lead Capture Form for another page on your website, you can create as many different one as like.
9. Once submitted, the forms and their details get submitted into your BoothBook's Lead Center
Additional Note
If you plan to add a custom Budget field, please note that customers should enter plain numbers only, without any extra characters.
For example, instead of $1,500, they should enter 1500.
Alternatively, you can add a note to show examples such as:1500, 2000, or 3000.
