Calendly Integration

BoothBook
Last Update 2 years ago
If you prefer to have a phone call with your leads before committing to their event date, this Calendly integration is the perfect solution for a streamlined process. It gives the lead an opportunity to schedule in a call at their preferred time, after submitting their lead form.
The below videos briefly covers all of BoothBook's current widget's however specifically on the various aspect within the Lead Capture Form.
Written Instructions:
- Create a free Calendly account
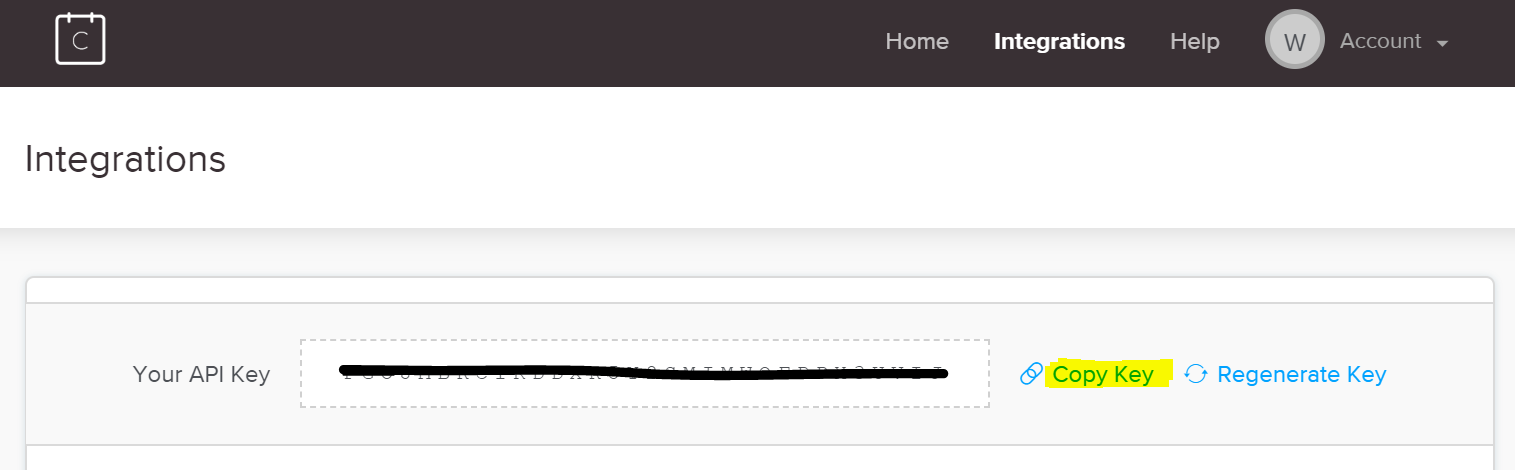
- In your Calendly account, head to Integrations
- Copy your unique API key
4. Head over to your BoothBook
5. Go To > Top User Menu > Settings > More Integrations
6. Paste your Calendly API key in the blank box
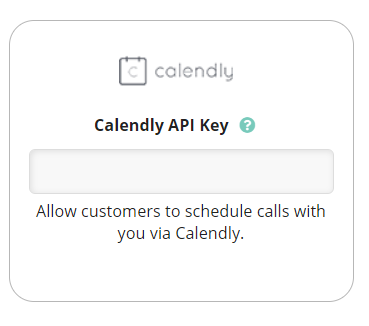
7. Click Save Configuration
8. Head to Top User Menu > Widgets
9. Scroll down to Lead Capture Widget and select 'Click here to create your own custom form!'
10. Once you're on your lead capture form template, scroll down to 'Submit Action'
11. From the drop down menu, select 'Schedule Calendly Call'. (this is the action take after the lead has clicked the Submit button)
12. You will see a new option appear below called 'Calendly Event Type'. The options in this menu are dynamically pulled through from Calendly ie. 15 minute call, 30 minute call
13. Choose the Calendly event type you would like to direct your customers to.
*TOP TIP* - You can only select one event type per lead capture form. If you direct your private and corporate clients to different landing pages on your website, you can embed a different lead capture form on each page, and choose different Calendly Event types for them e.g. Corporate Event = '45 minute Corporate Discussion' and Private Event = '15 minute Introduction Meeting'
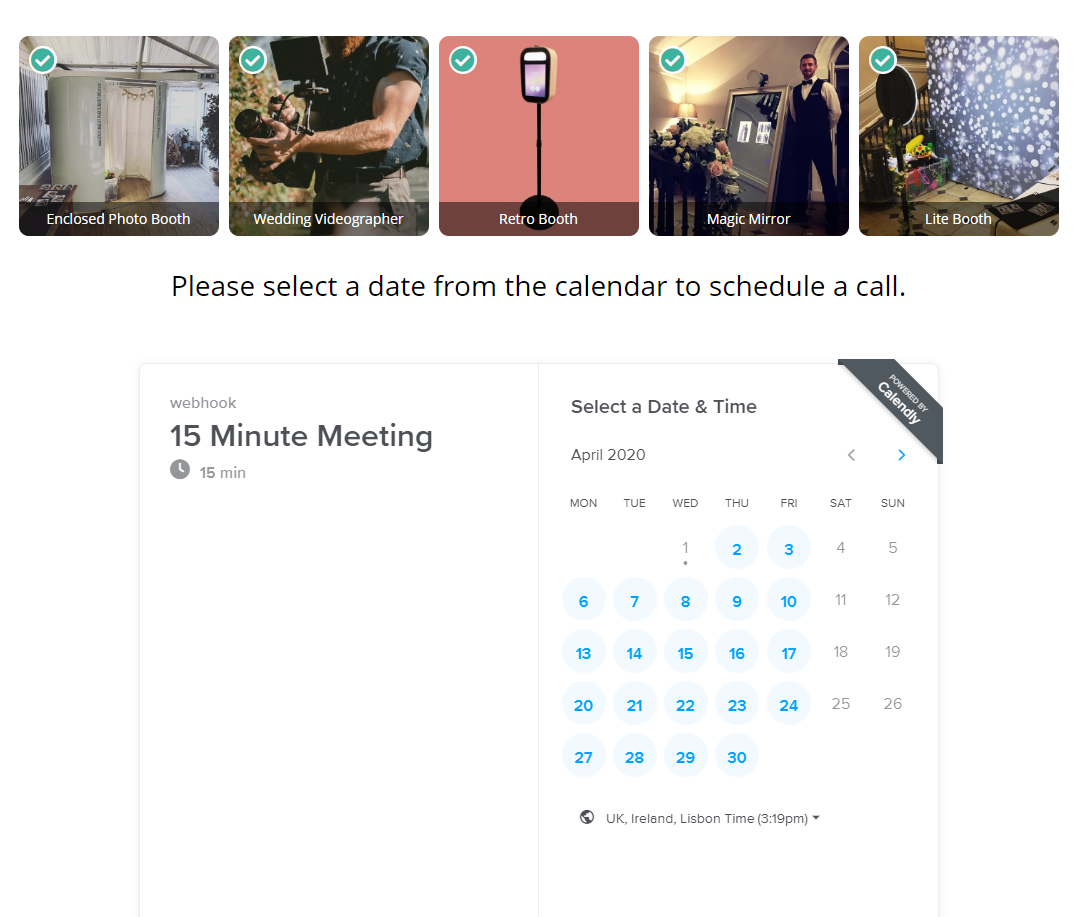
14. Optionally show the services you have available for the requested date. This will appear above the Calendly calendar so the customer can get an idea of what's on offer for their event. Please note this option only works if the event date field is enabled. See example below.
15.Choose to edit the customer facing message, which is placed above the Calendly widget, see example below.
16. Once you are ready, copy the widget code in the grey box, and embed it onto the appropriate page on your website. If you need assistance embedding this onto your website, please contact your website developer, or start a new conversation in Live Chat and we will do our best to assist.