Automations: Subscribing a new lead to MailerLite
BoothBook
Last Update vor 2 Jahren
BoothBook allows our Pro Users to configure actions that will subscribe or unsubscribe a customer to an MailerLite group.
These could be a simple as a follow up email to a lead or booking or as complex as a full drip campaign setup in MailerLite where the customers list could change based on their customer journey in BoothBook.
1. Subscribing a lead to a Mailerlite Group
To add a new Lead to a ActiveCampaign, you will first need to have a ActiveCampaign account and an audience you want to subscribe different leads or clients to. Go to https://www.mailerlite.com
You can read more about how to create groups in Mailerlite at: http://help.mailerlite.com/article/show/48133-what-is-the-difference-between-groups-and-segments
2. Create an Automation
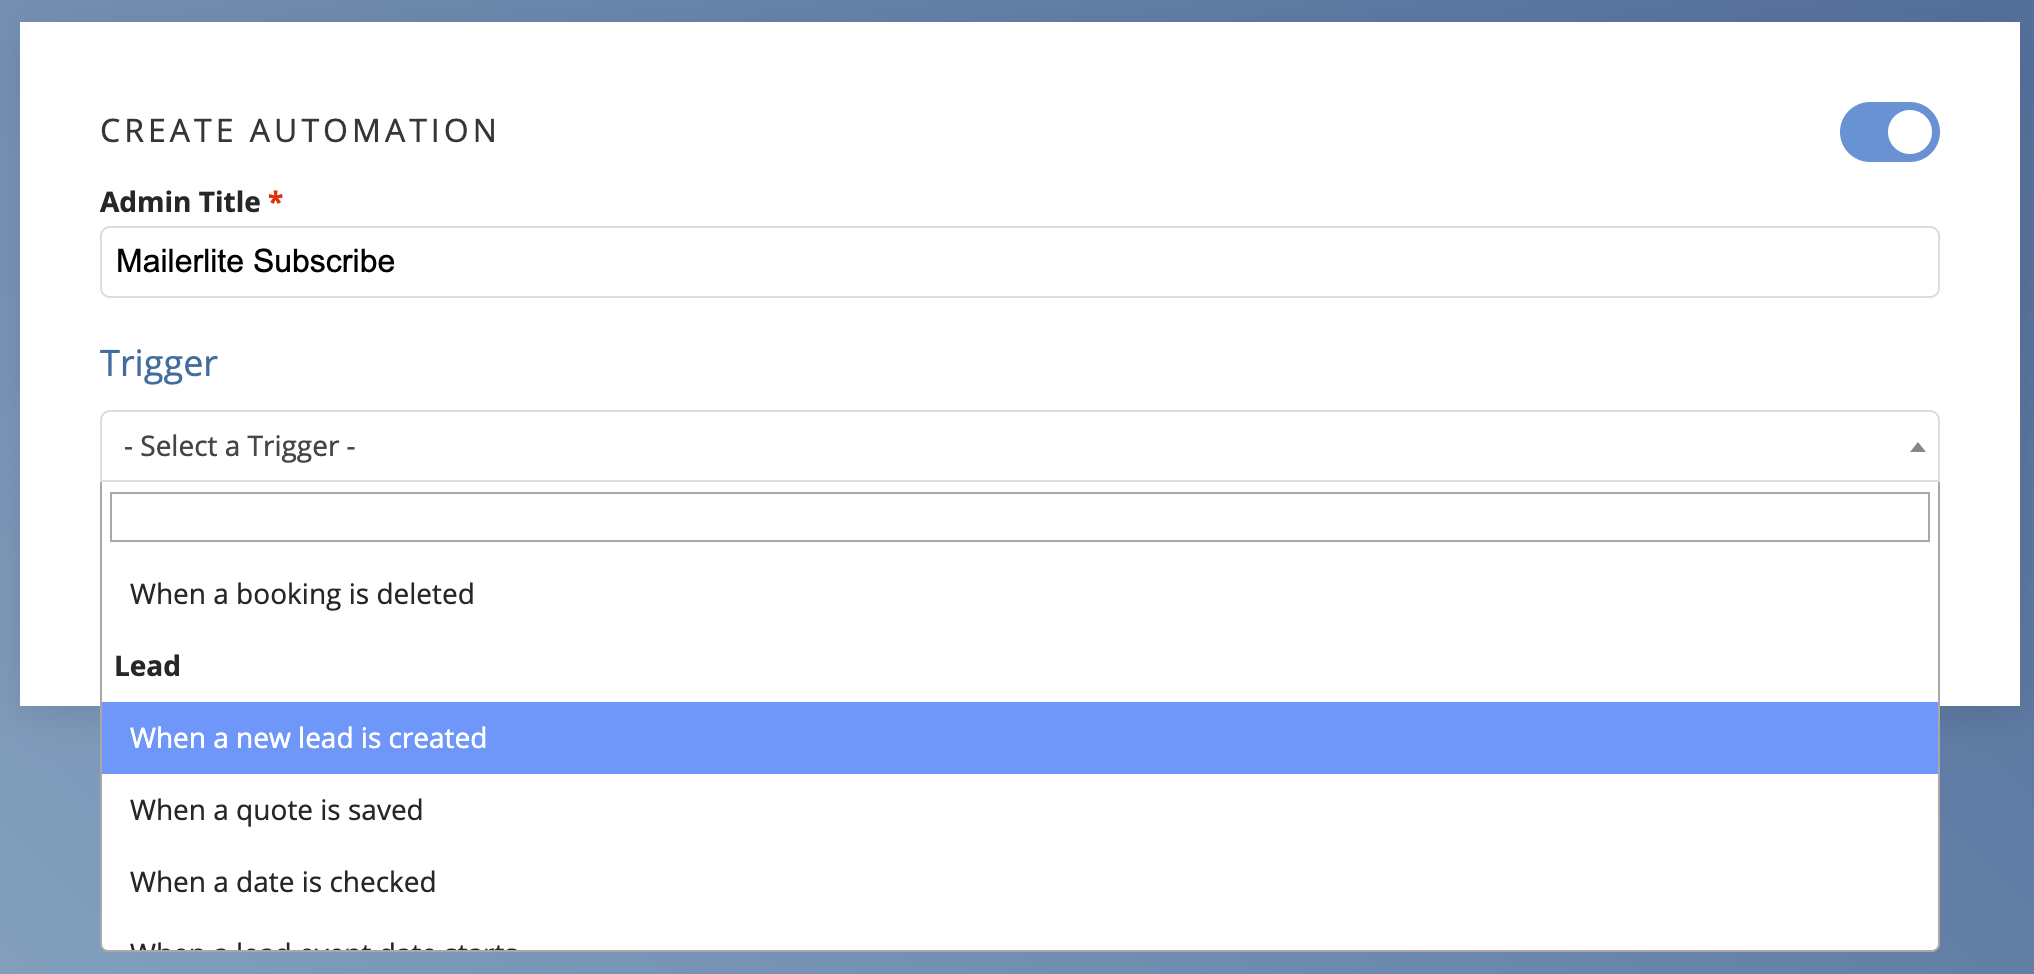
Go to Top User Menu > Settings > Automations and click Create Automation.
- Turn on the automation with the switch in the corner.
- Name the Automation.
3. Select a Trigger
Select the Trigger of When a new lead is created. That means anytime you add a lead or the customer checks a date with the lead widget it will trigger.

4. Configure the Schedule
- Scroll down to the Schedule section.
- Click Add a Schedule.
- Set it for 30 Minutes After.
- Choose the drop-down for Send Anytime.

Note: We give it a scheduled delay so that the conditions will be able to check and see if they have booked.
5. Add the Conditions
- Scroll down to Conditions section.
- Click Add a condition set.
- Select Match any condition below.
- Click the button for Add new condition.
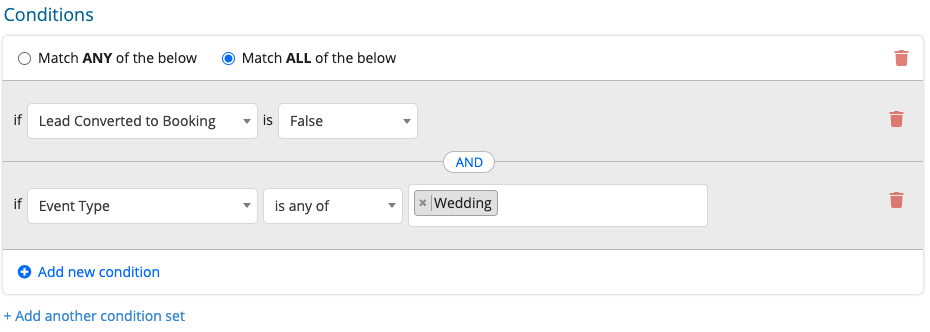
From the drop-down select Lead converted to a booking and select False. This will stop the lead from going to MailerLite if they have become a booking/customer.

- Optionally if you have your Event Types set up for leads (https://support.boothbook.com/article/create-event-types) you can sort your Leads into different lists/audiences and do different emails and drip campaigns.
- You would click Add new condition
- Select if Event Type is any of
- Choose the event type you want to target.

6. Create the Action
- Scroll down to Action section.
- Click Add an action.
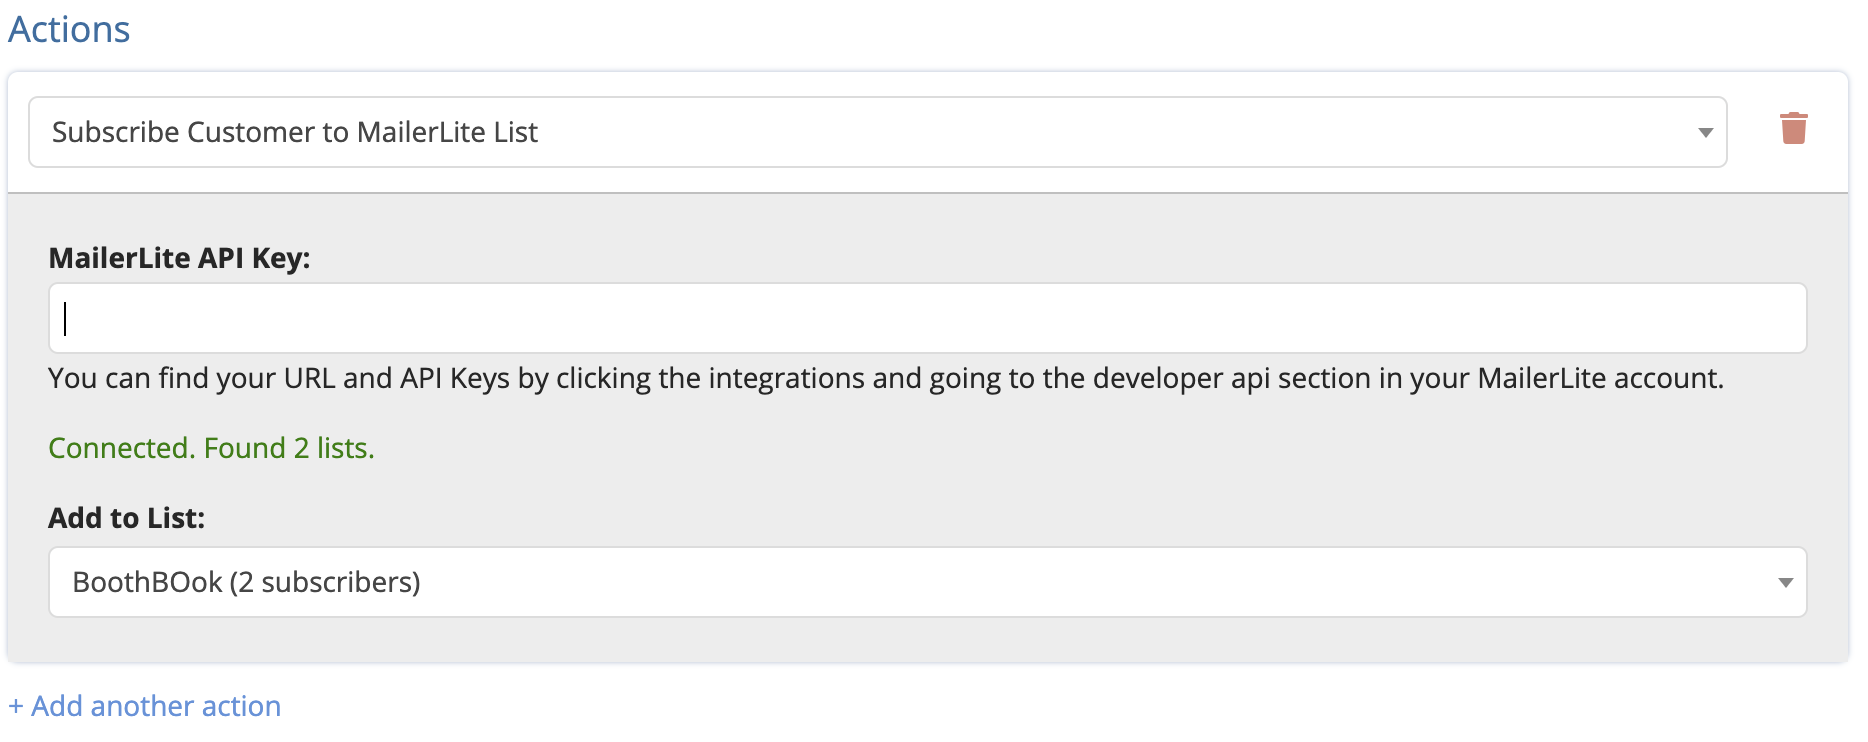
- Select Subscribe customer to MailerLite List.
- Copy and paste your MailerLite API Key into the box. How to get your MailerLite API Key: http://help.mailerlite.com/article/show/35040-where-can-i-find-the-api-key
- Select the MailerLite group you want to add them from in the drop down
- Click Save

7. What's Next?
Inside of MailerLite you should have already setup a campaign for that list.
You can now set up a drip campaign from there.

