How to set up Canned Responses

BoothBook
Last Update 2 years ago
By setting up canned responses, this will enable you to save time when communicating to customers through email and SMS. A canned response is a templated message that already includes what you would like to say to the customer, you can then simply add this template to your message. By using canned responses it will also allow customers to always receive a professional thought out response from your business, variables can also be included within these responses to personalise these to each and every customer.
Please follow the steps below to set up Canned Responses:
1. First you will need to go to Top User Menu > Message Icon > Canned Responses
2. You will now need to create your canned response, so select Add a New Canned Response.
3. You can now title your Canned Response, so i.e Quote Information, Enquiry Response.
4. Next you will need to add content to your message, so for example if this was for Quote Information you could write something similar to this:
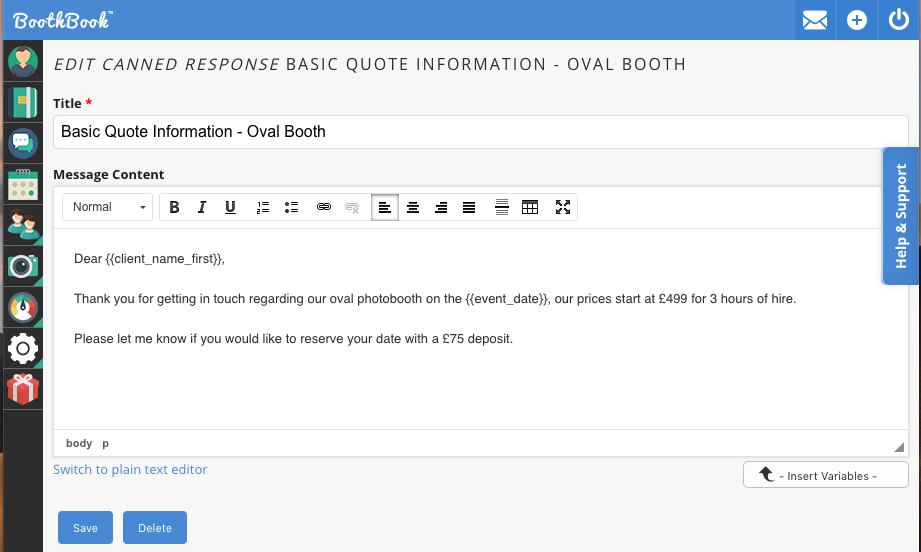
5. As you can see from the screenshot above Variables have also been included within the message, these can be used to personalise a message to customers by taking information from their bookings and applying these to their messages simply by adding variables. If you are unfamiliar with using variables or you are unsure of what these are, please find more information on using these with following the link - How to Use Variables!
6. Whilst creating your message, you also have your normal text editing tools above where you can change the font and structure of your text. You can also add headings to your message as well as link URL's within these as well as change your text to plain text editor if preferred.
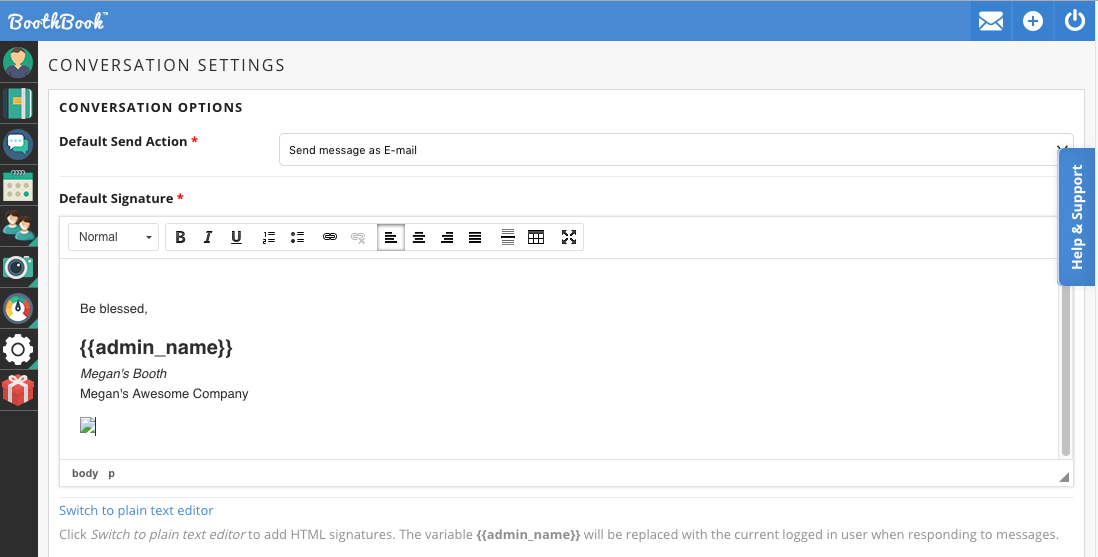
7. You can also finish your canned responses with a Admin signature, to add this you will need to go to your Conversation Settings. To find this select the Envelope Icon located on the top right of the page.
8. You will then be taken to your Conversation Settings page, where you can edit the following; Default Send Action, Signature, Message Notification as well as your IMAP Server Details.
9. To create an Admin signature, you will need to add this under the field of Default Signature. You will find an Admin variable used here, which will replaced by the name of the current user logged in. You can then manually add any further details underneath your signature.
10. Once you are happy with the signature created, you can Save Configuration.
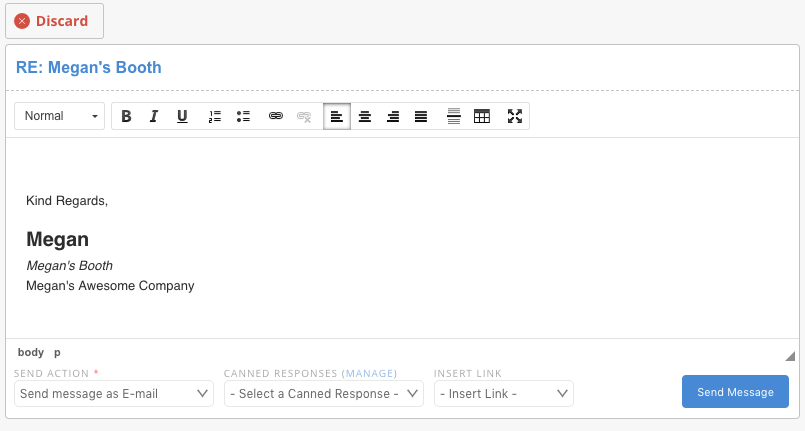
11. When you then send your messages using Conversations your signature will appear at the end of every message for you.