How to Create Bespoke Packages

BoothBook
Last Update منذ ٤ أعوام
Bespoke packages can be created for customers who need a custom package specifically to suit their event such as corporate customers. These packages will often consist of special requests from the customer as to what they would like at their event so you may not want this package to be available to other customers.
As you start receiving information from your potential customer, perhaps via phone or email, you can start recording them as a Lead.
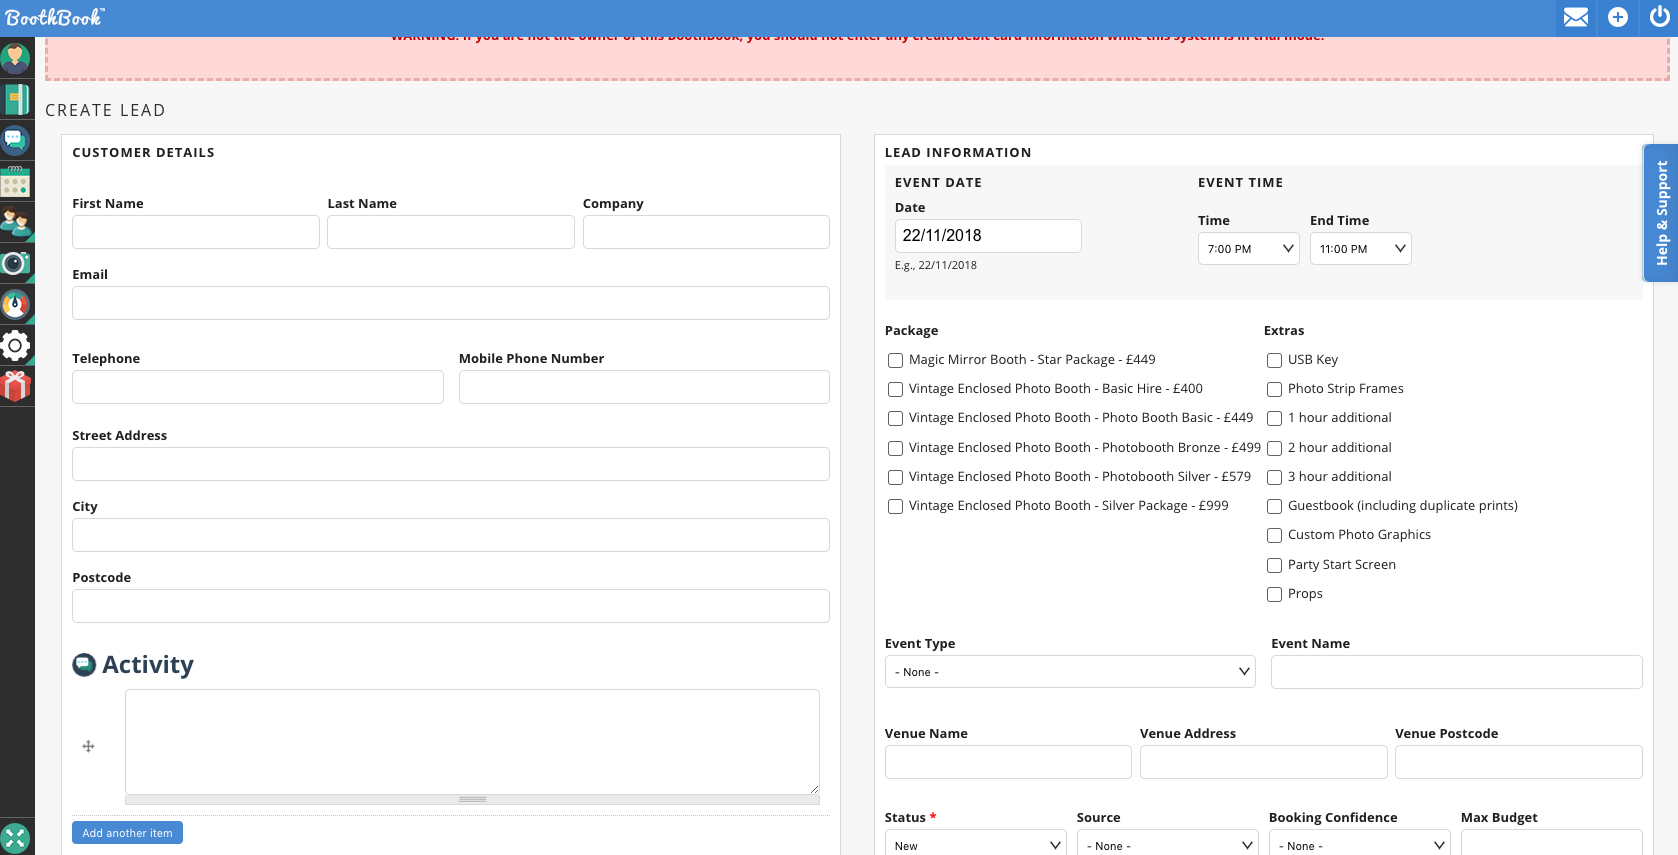
1. Create a Lead for that customer by going into Leads > Add Lead. This will then take you to the Create a Lead form where you can add as much information as you wish. The Create a Lead form will ask you to fill out the customers personal details e.g Name, address, contact number, email. Alongside this form you will also find a Lead Information form which will then ask for the fields e.g Event date, time, event type, package to be completed. Don't worry about selecting a package option yet as this needs to be created first. Once you have finished completing your Lead form you can select Save. This will then be added alongside your other Leads. (Please see Screenshots below)
2. Now before you create the bespoke package for your customer, you will need to ensure you have created any new extras needed for your package. To create an Extra go to Assets > Extras > Add a new Extras Product. For further help with how to create Extras please select the following link here which will take you to one of our solution articles (Create and Manage Extras).
3. When you have finished adding all the extras you wish to include within your bespoke package you can now create the package itself. You will now need to go to Assets > Packages > Add a new Package. You will need to complete the below fields e.g Title of package, unit type included, type of event, price of the package as well as a description of the package you are offering to the customer. Following this you will also need to select the Extras included so any new Extras you created before will appear on this page also, select your chosen ones to add them.

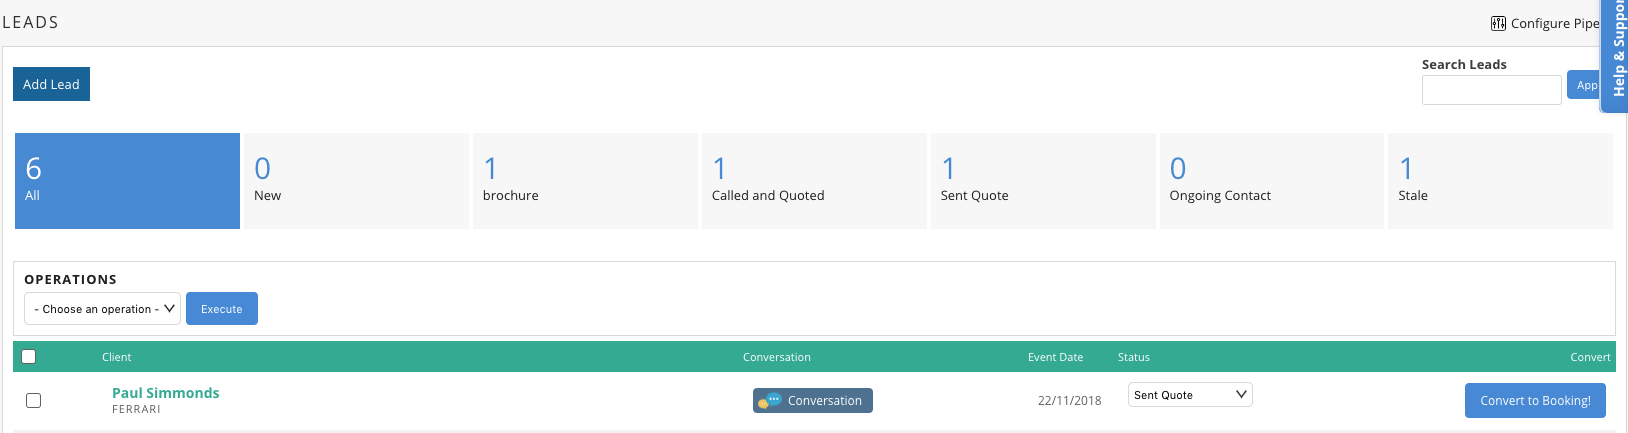
4. If you are happy that you have included all the needed details for this bespoke package then select the button Save this will add the new package to your BoothBook. You don't want other customers to be able to book this bespoke package so it's important to convert your earlier Lead created into a Booking. You can do this by going to Leads and then selecting the one you created earlier for this particular customer. Once you have selected the Lead it show you all the information you entered earlier, as your bespoke package has now been created you will see the package has now become an option to select on the Lead Information form. Select the bespoke package to add this detail to your Lead follow this by selecting the button Save. Continuing with the Lead you will see a button that says Convert to Booking, select this and it will then take you to the booking form on your BoothBook website.
5. You can then complete this booking manually for the customer for their bespoke package, this ensures that the booking can go through promptly so you are able to disable the package from your BoothBook. By disabling the package this will then remove this bespoke package from your BoothBook so you can avoid other customers from purchasing this package also.
Disable the Bespoke Package
To disable the package you will need to go to Assets > Packages and then select the Edit button on the bespoke package. At the top of the screen you will see a checkbox you can select which says Disable this Package. This will hide the bespoke package from your booking form. If you wish to add these disabled packages back to your BoothBook you can do so by going into Assets > Packages. Below Add a new Package you will find three filter menus. The first one, Active, gives you the options to view Active or Disabled packages. Active packages are the ones currently showing on your BoothBook and Disabled the ones you have hidden from your booking form. Once you have selected Disabled you can select the package you wish to make Active again by clicking on Edit then again as above select the disabled checkbox which will untick it and complete this with the button Save.
6. Once the admin has been completed, depending on your settings, this may present you with the contract and payment pages for the booking which you can ignore. The customer will be notified via email the confirmation of their booking, following this the customer will be notified on their client portal also so any contracts that need to be signed or payments that need to be made can be done so on their portal.