Add a HTML signature to your emails
Create a default signature for an email

BoothBook
Last Update منذ ٣ أعوام
There are two places in BoothBook we can add HTML signatures.
- In messages sent from the inbox & conversations area.
- In messages automated through scheduled automations.
When responding to a customer from BoothBook, it is important to make your email look as legitimate as possible. The reason we do this, is to make sure the customer feels like they are talking to you directly, and not from an automation in a CRM.
Using HTML, we can embed fonts, colours, styling, images, links, video links and much more.
The following steps apply to the 2 locations we can add HTML signatures.
1. Add HTML signatures to Conversations (Not available to "Newbie" Accounts)
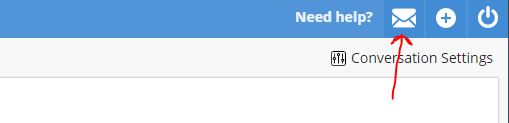
To add a signature to our outgoing messages, we start by visiting the inbox.
- Click on the message icon in your toolbar to visit the inbox.
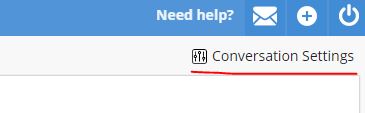
2. In the inbox, click the "Conversation settings" link in the top right.
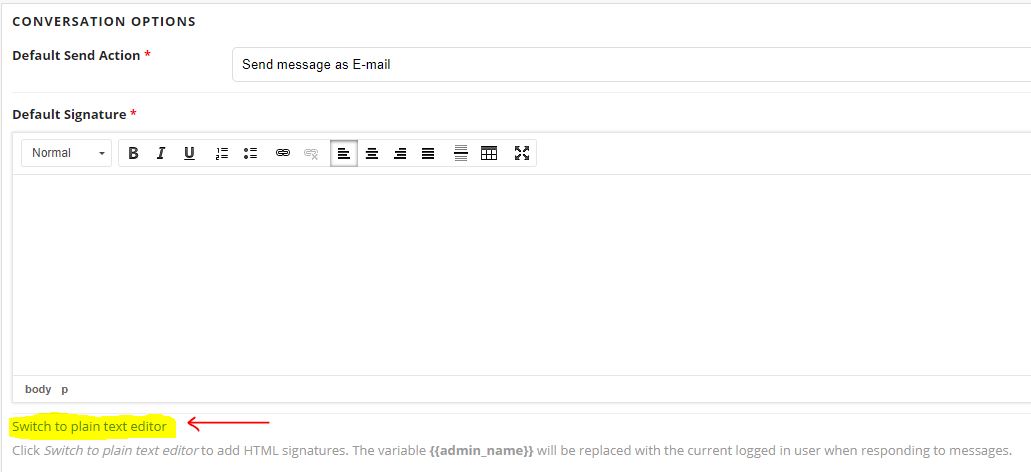
3. In the conversation settings, click the "Switch to plain text editor" link under the default signature field.
4. Paste, or write your HTML in the field.
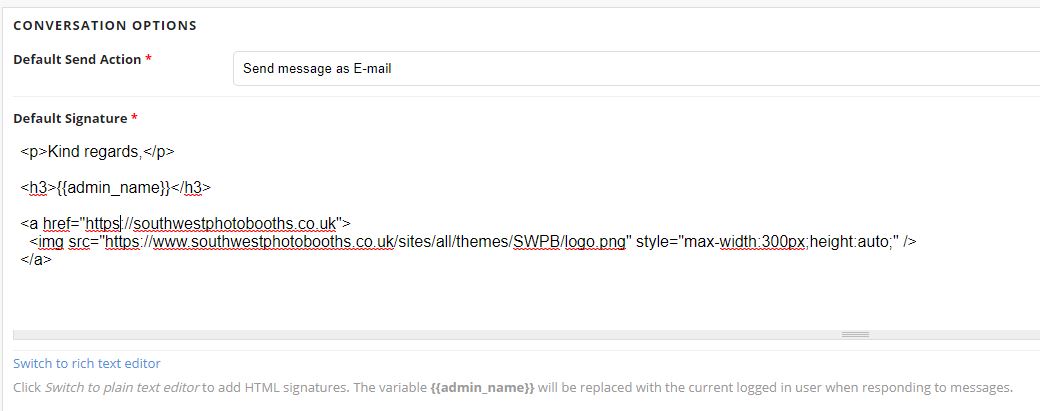
Tip: The HTML you use is up to you - perhaps you already have it written in your email software and you just need to copy it? If not, the following HTML signs off the email, includes the name of the admin, and adds the logo from your website (replace with your logo by right clicking on your websites logo, and selecting "copy image URL").
<p>Kind regards,</p>
<h3>{{admin_name}}</h3>
<a href="https://southwestphotobooths.co.uk">
<img src="https://www.southwestphotobooths.co.uk/sites/all/themes/SWPB/logo.png" style="max-width:300px;height:auto;" />
</a>
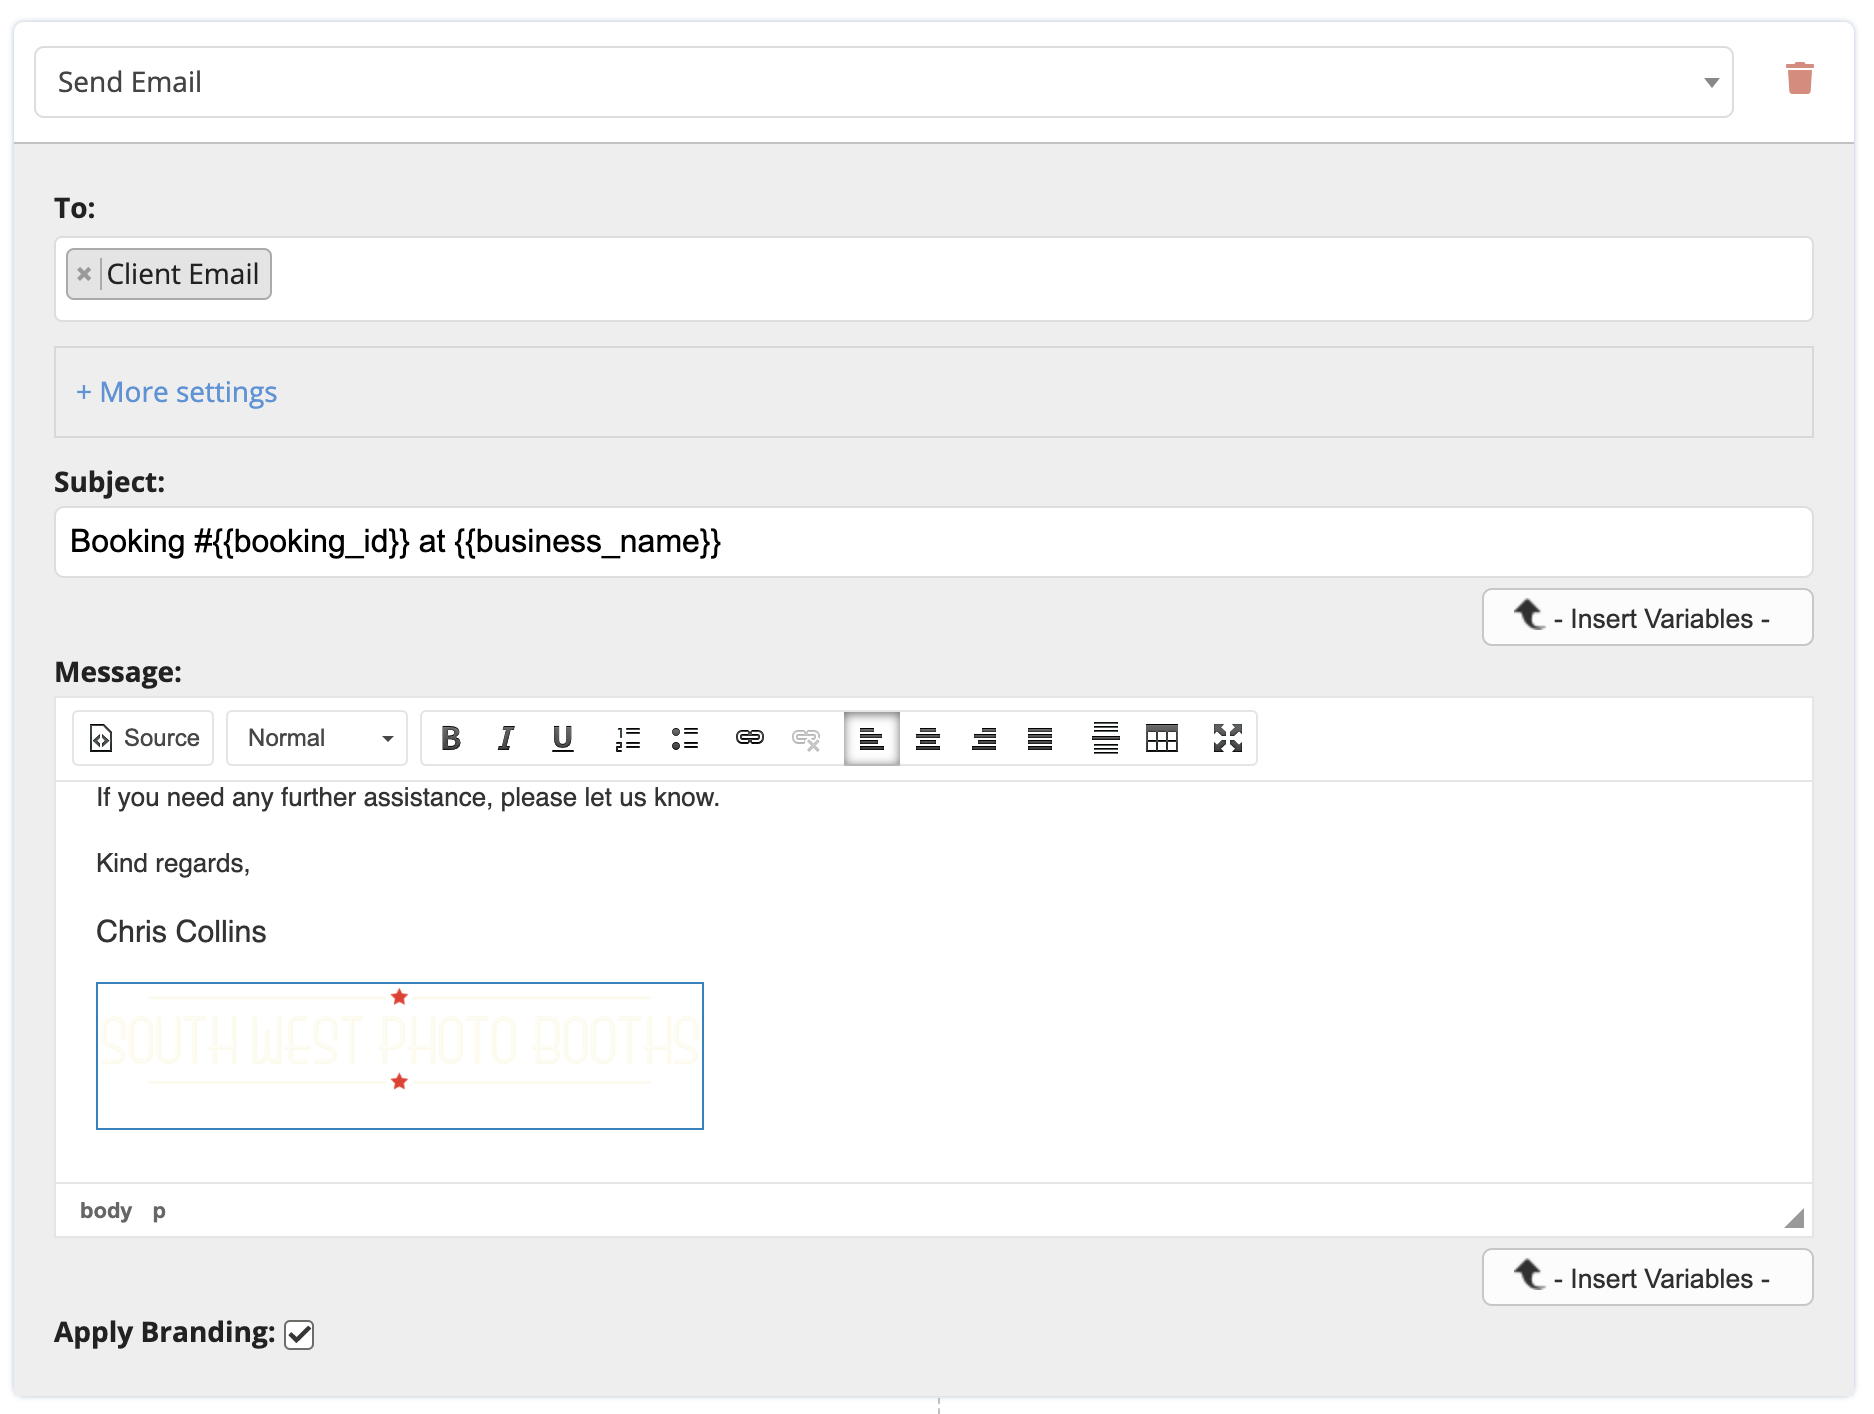
5. Click "Switch to rich text editor" to view the rendered HTML and check everything is ok.

Tip: The variable {{admin_name}} will be replaced with whichever admin is currently logged in and responding! Awesome!
6. Click save!
2. Add HTML signatures to Email Automations
1. Visit the Automations section and edit, or create a new Automation
2. Click "Source" button in the toolbar.
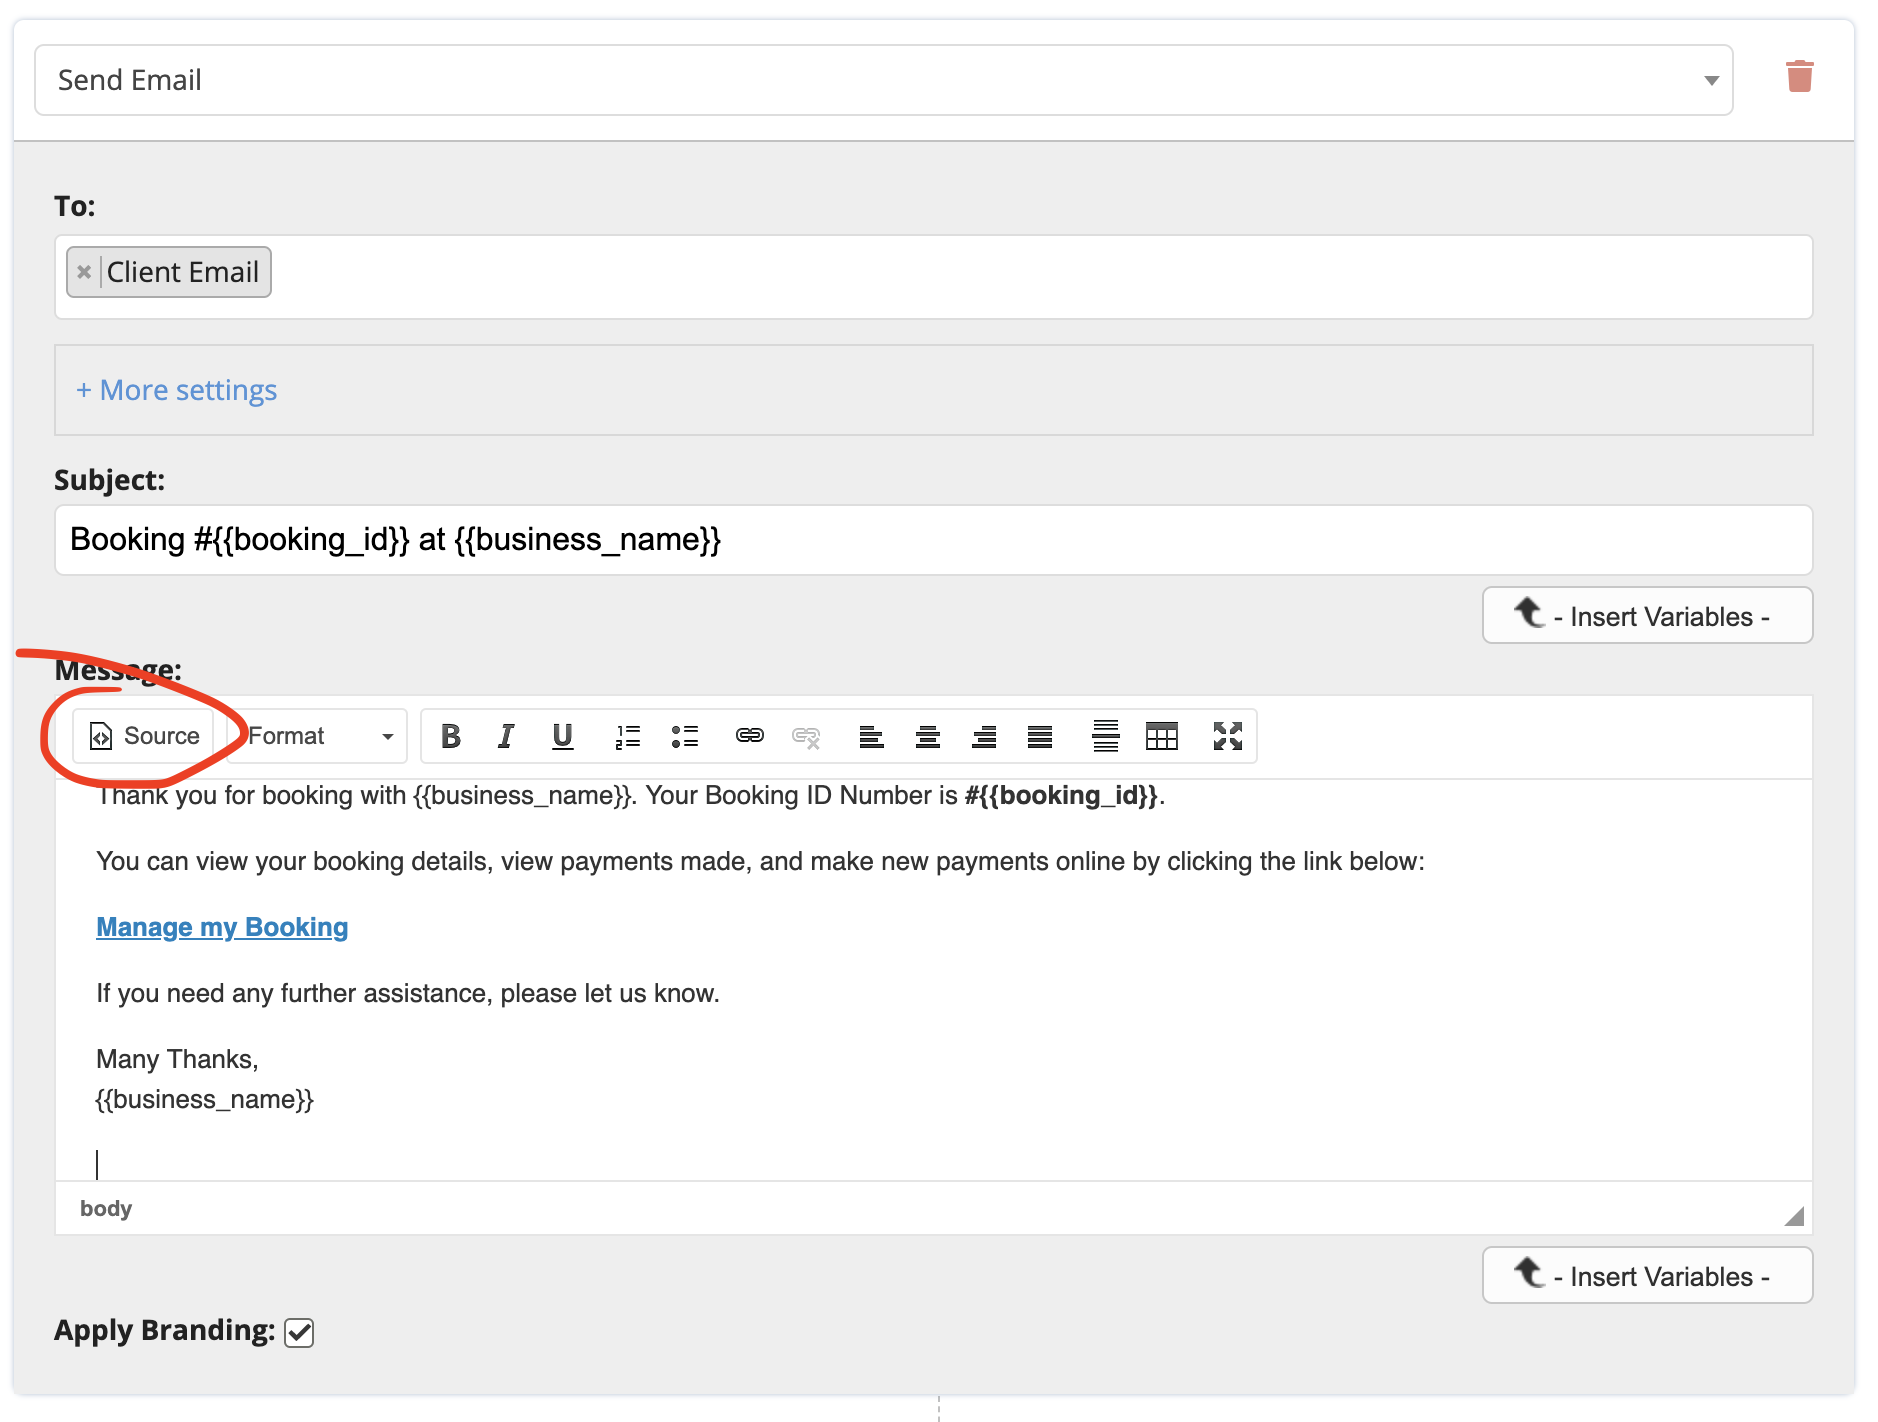
3. Scroll to the bottom of the HTML in your notification content, and paste your HTML signature.
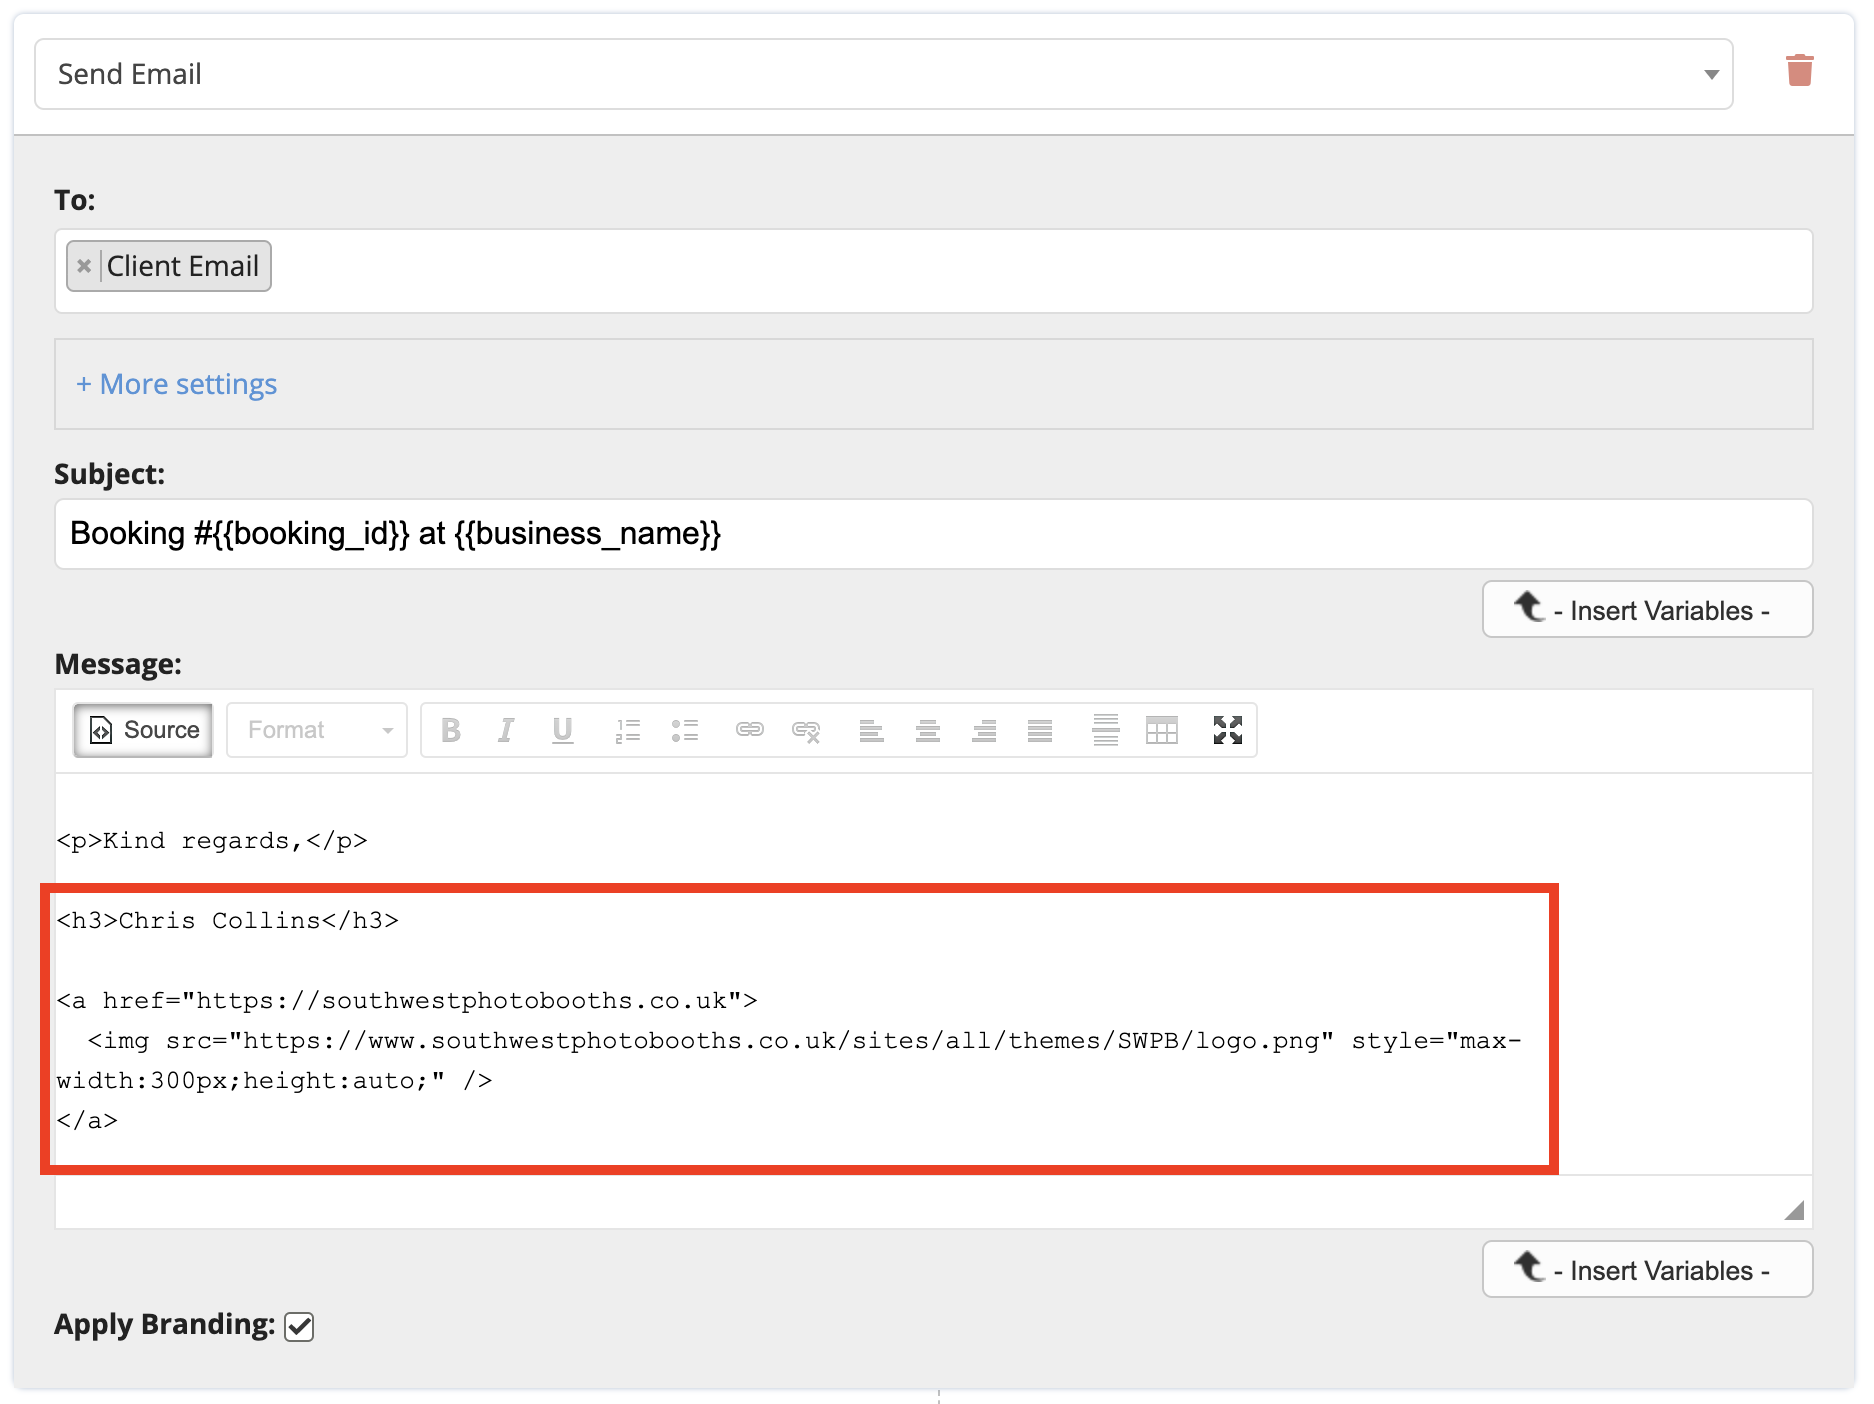
Tip: The HTML you use is up to you - perhaps you already have it written in your email software and you just need to copy it? If not, the following HTML signs off the email, includes the name of the admin, and adds the logo from your website (replace with your logo by right clicking on your websites logo, and selecting "copy image URL").
<p>Kind regards,</p>
<h3>Chris Collins</h3>
<a href="https://southwestphotobooths.co.uk">
<img src="https://www.southwestphotobooths.co.uk/sites/all/themes/SWPB/logo.png" style="max-width:300px;height:auto;" />
</a>
4. Click "Source" to check that everything looks ok.
5. Click Save!