How to use Variables

BoothBook
Last Update hace 2 años
Variables can be used to personalise business emails, SMS messages, proposals, contracts, invoices by referencing information already collected.
For example when a customer makes a booking with your business, this is acknowledged by your BoothBook system automatically responding with a confirmation email. This confirmation email would then be addressed to the customer in accordance with their booking so this could include information such as the customer's name, date of event and the location of the event. Instead of writing out all these details for the confirmation email you could write an email template and include variables, this would then tailor each email to include the details of each individual customer. You can find a multitude of variables to choose from on BoothBook for all your communications.
The below video explains how to add Variables in Scheduled Notifications, however the process is very similar for all communication methods through BoothBook. See further instructions below.
To learn how you can use variables please follow these steps below, I will be using the example of email to apply these variables.
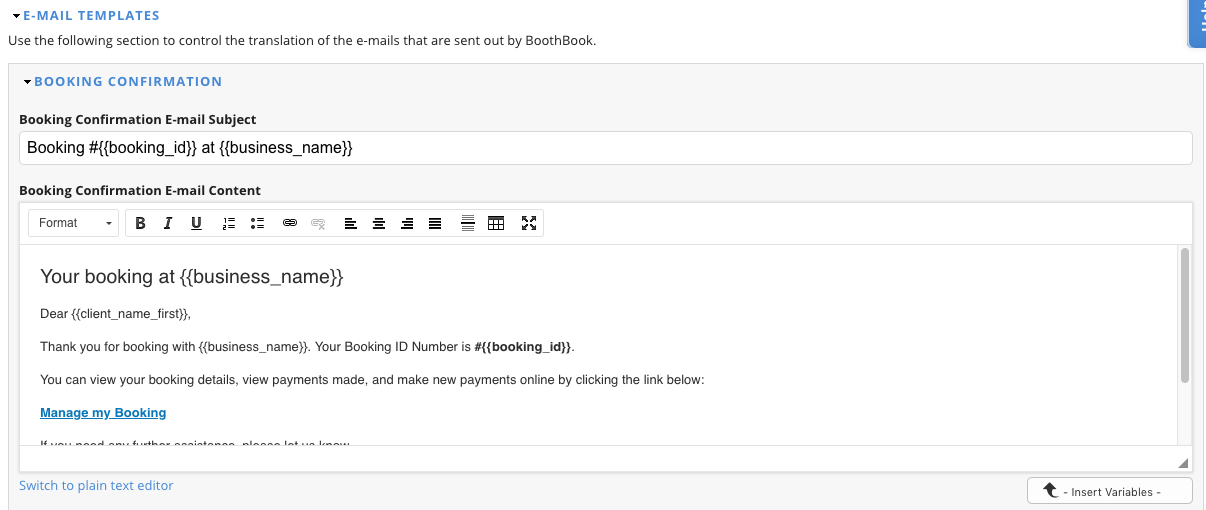
1. Go to Top User Menu > Settings >Translate> E-mail Templates> Booking Confirmation
2. Once you have selected Booking Confirmation you will be able to view the template used for your booking confirmation emails. Your email template should then show the following:
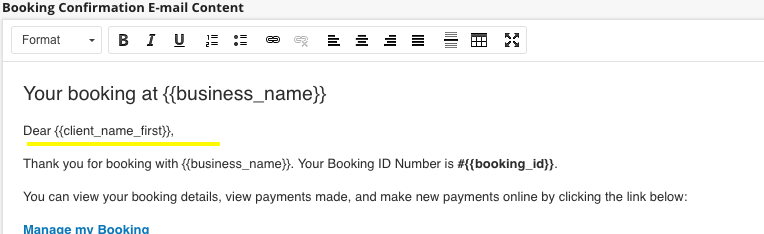
3. The email template will then show you the content of the email you are sending to customers as well as the variables included. Variables can be identified through the symbol of {{ which will always be around the content that will be changed. The variables used will also clearly state what details will be replacing this. As she can see in the screenshot below the variable states {{Client_name_first}} so when the email is sent this variable will then change to the customer's name.
4. To change or add variables to the email you will first need to click in the text area you wish to add the variable to. You can then select the Insert Variables button located at the bottom right of the email template, once you have selected this button it will then present you with a drop down menu to choose from the different variables available.
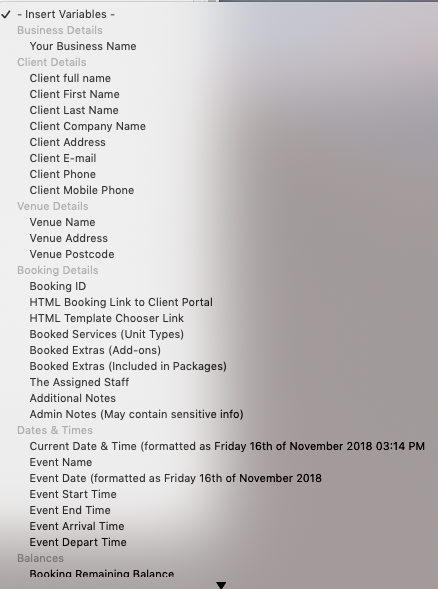
5. You can then select a variable you wish to include in your email, this will then be added into the template of the email. You can add as many variables as you like to the email, and all of these variables will automatically change to the details of the customer once it has been sent.
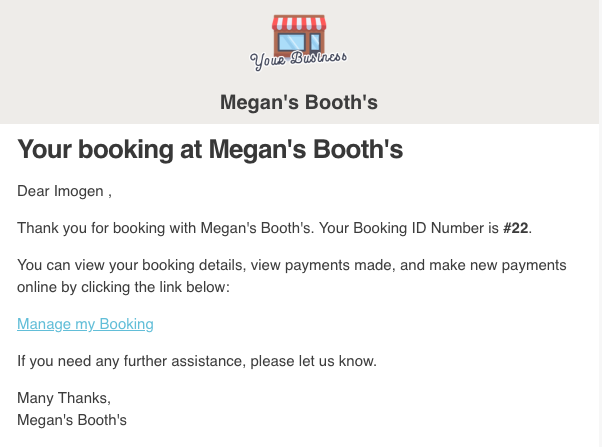
6. If you are happy with the email template you have created then select the button Save Configuration which is located at the bottom of the page. This will save the email template and will automatically use this for your booking confirmation emails. Below is a screenshot as to how the variable will then change to the customer's name once it has been sent.