BoothGallery Website Widget
Configure and add your BoothGallery gallery to your website

BoothBook
Last Update 3 года назад
Generate your own widgets from your BoothGallery account. This is then ready to embed on your website.
- In your BoothGallery dashboard, go to Build Your Widget
- Configure your Layout, you'll see a preview in the same page of how your widget will look. Choose Rows/ Grid, Number of Columns, Number of Galleries, Font style, Text and Background Colour as well as included items such as Thumbnail (image), Title, Date and Description.
- To change the Text and Background Colour you will need to select these fields first and then once selected click onto the colour dial. The colour dial will show you an outer circle to choose the colour and then an inner circle to choose the shade of your colour. As you are choosing these colours you will also see that the fields change in correspondence with the colours. Every colour is defined by a Hex code so as the colour is changing inside the field you will see the code for the colours change as well.
- Copy the code that appears underneath the widget preview
- Paste the code into your website in an area that allows embedded code
Some help guides are below:
- Wordpress - how to add HTML code
- Wix - how to add HTML code
- Squarespace - how to add HTML code
- Weebly - how to add HTML code
Having Issues In Your Website?
Troubleshoot Problems Here First then try the below configuration:
(This configuration also works well if you have a combination of landscape and portrait galleries)
- Choose the Layout: Rows option
- Number of Galleries: 1
- Select any preferred color and font options
- Include Items: Thumbnail, Title, Date, Description
- Copy the code and paste into your website in an area that allows embedded code
- Remove the code in between and including the tags <script>...</script>
- Directly after <iframe , add class="boothgallery-widget"
- Add the following code above your <iframe>...</iframe> tags:
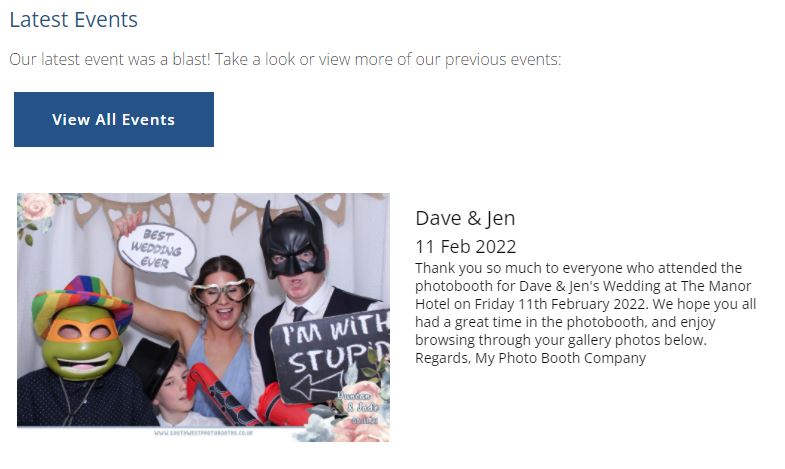
9. Add in a heading, some text and a button linking visitors to View All Events on your BoothGallery home page eg. gallery.mybusiness.com (if you're on a BoothBook Basic plan or above you can access this feature for free with the BoothGallery Pro account - find out how here).
10. Having this Latest Events area on your website gives your website visitors a great first impression, that you are a current, established business, with recent events and reinforces trust in potential customers. Your configuration will look similar to the below in your website: